This is how I sew in toe-plugs. I don't glue them in. As you can see in this photo, I've stitched down the main stem, and taken two stitches across the toe before I start sewing in the toe-plug. Depending on the size of the toe-plug and the length of your stitches, the number of stitches across the toe-plug before engaging the toe-plug will vary.
Here, I am pushing my awl up through the holster to the point of the stitching grove in the toe-plug.
I'll be adding more photos and text as time allows.
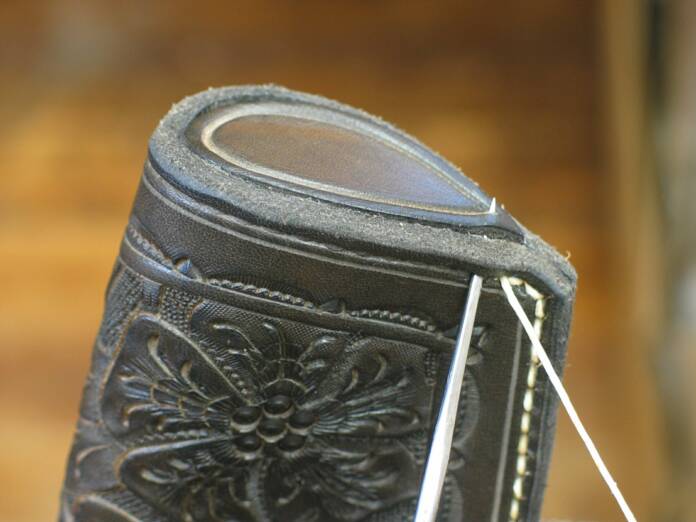
Here, I have flipped the holster around and I've pushed my awl up through the holster from the other side, into the point of the stitching groove in the toe-plug.
It is important when sewing toe-plugs to have a deep stitching groove in the toe-plug. It makes it much easier to get a good stitch.
Also, just push the very end of the awl through the toe-plug. It is better to have a tight hole rather than tear-out the toe-plug.
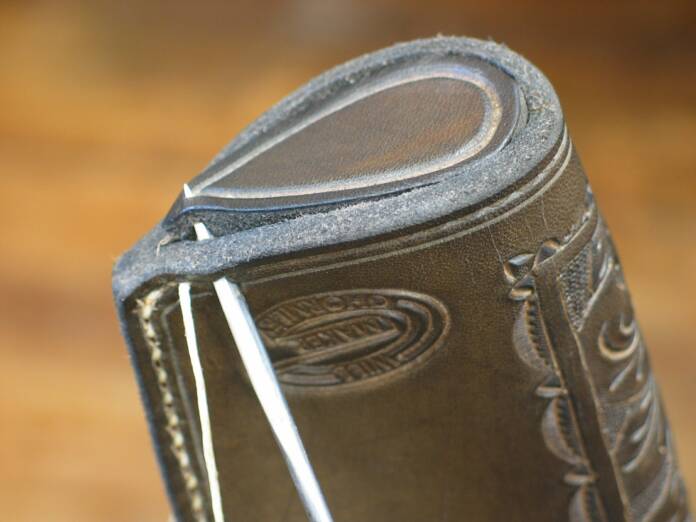
To start the actual stitching, the needle first must go up from the back-side of the holster into the point of the toe-plug.
I brace the area around the needle and thread with my fingers to help the leather resist any forces to tear-out. Tear-outs are a common occurrence among inexperienced sewers of toe-plugs. It isn't the end of the world, but it doesn't look nice.
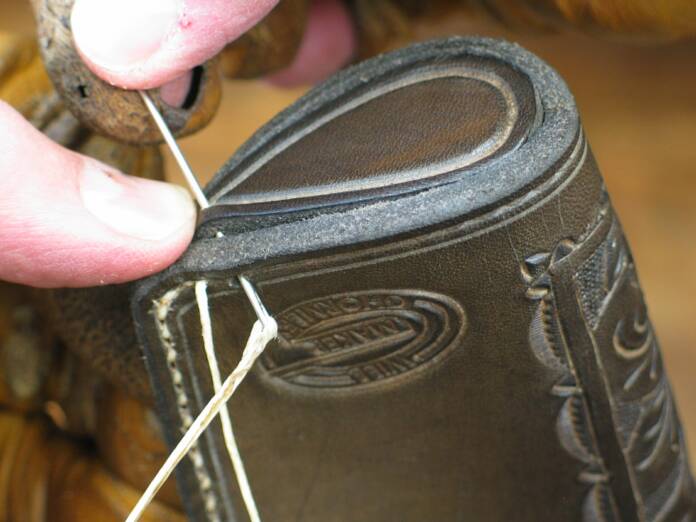
After the thread has been pulled through from the back, flip the holster back around so you can work from the front. The needle then needs to go down through the toe-plug and come out the first stitching hole in the front of the holster.
Here you see the needle being pushed through to the front of the holster. Notice how the needle is goin' back down into the toe-plug almost exactly where it came up from the back.
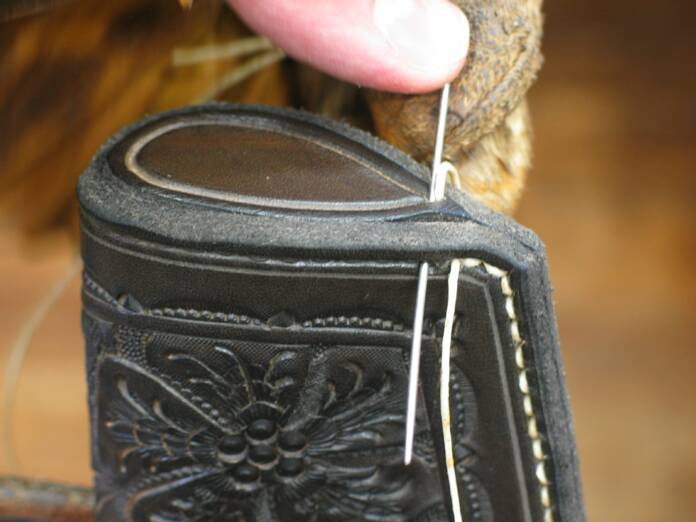
Once the thread is pulled through from the back, it's time to run the thread from the front up through the toe-plug.
In the photo you can see I'm pushing the needle from the front thread up through the same hole the as the thread from the back of the holster.
Once the two threads are pulled tight, the tip of the toe-plug is secured in place.
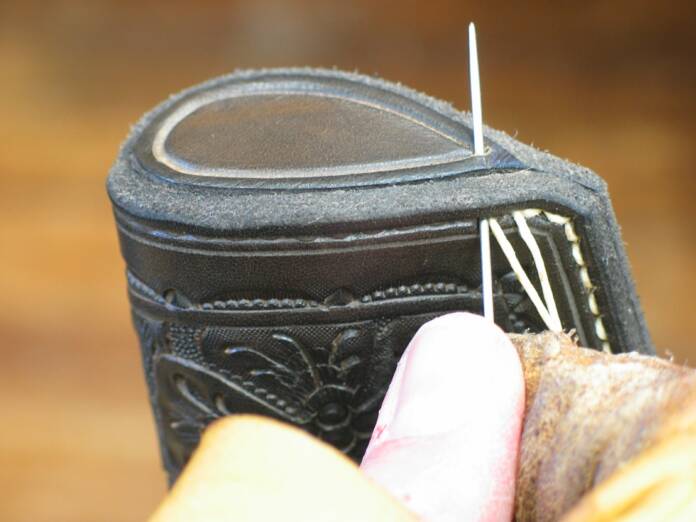
With the tip of the toe-plug secured, I can use my awl to begin a series of holes for the next stitches. Only make a few holes at a time to keep the toe-plug aligned within the toe of the holster.
You can see I am angling the awl to make holes that run towards the tip of the toe-plug. This will be important as you reach the top of the toe-plug. If you don't angle your holes now, your stitching holes will be too close together at the top and rip out.
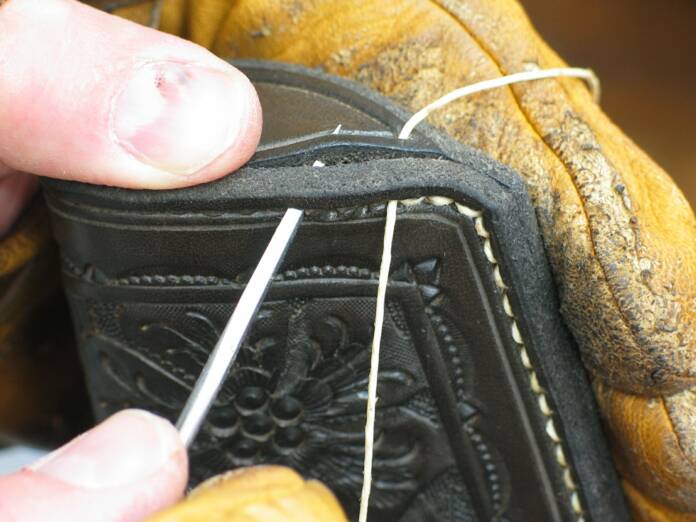
Now you can begin sewing the toe-plug almost like regular hand stitching. One thread will always be coming out of the toe-plug, and one out of the holster.
Continue making angled holes with your awl that lean towards the point of the toe-plug. At the top of the toe, your hole will point straight down to the point. As you stitch down the back side of the holster, angle those holes towards the toe-plug as well.
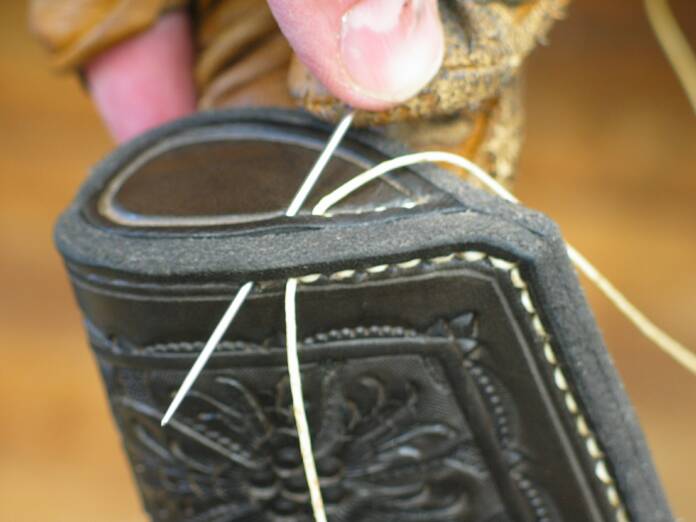
When you have stitched all the way back to the point of the toe-plug, the thread that is coming out of the last hole in the toe-plug needs to go back through the first hole in the front of the holster. Here, you see the needle goin' back through the earlier hole to come out at the front of the holster.
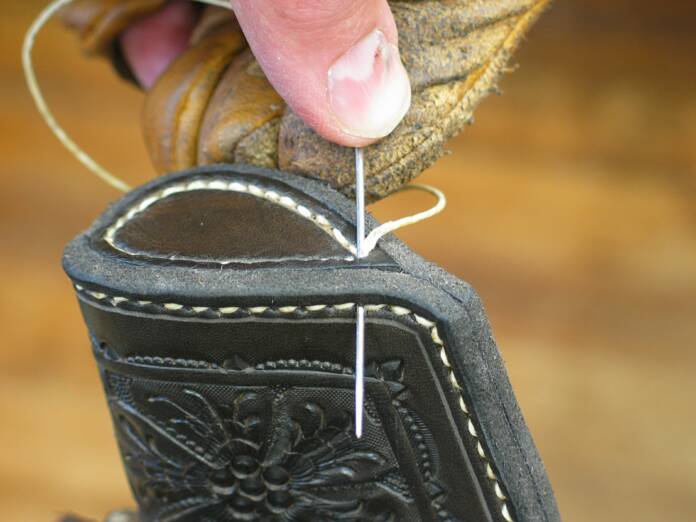
One thread is coming out the front, and one coming out the back. The toe-plug is now sewn in. Back-stitch a couple holes to lock the thread.
In the photo, the thread from the front has already gone back through the previous hole and is at the back. The needle from the back is being pushed through to the front.
Two back stitches are enough, with the front stitch goin' through a third stitch and both being cut off at the back.
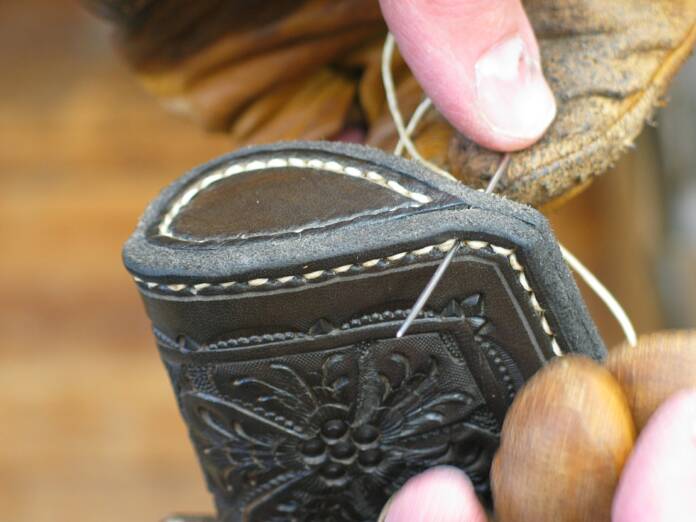
To assemble the hammer tie-down, the hammer loop needs to be folded in half and the ends secured with a blood knot. It is easier if the slits in the leather are stretched out before you try to force the leather through.
Notice in the photo, one slit is longer than the other. The leather will pass through the longer slit first.
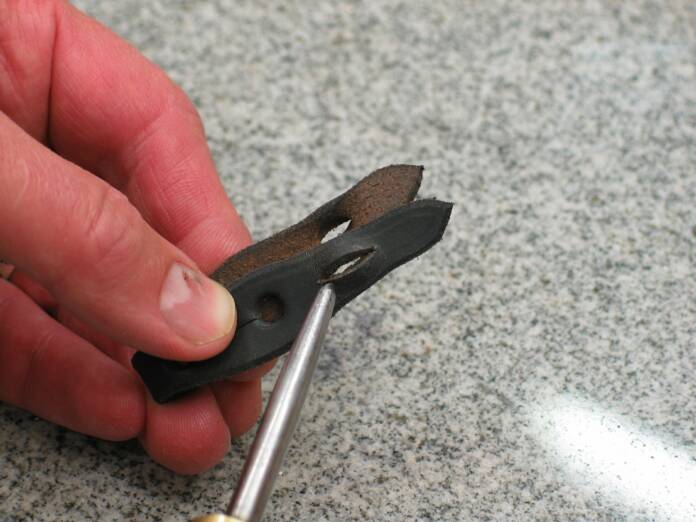
The leather has been forced through the longer slit.
In the photo, I've turned the leather over to force the other end of the leather through the smaller slit.
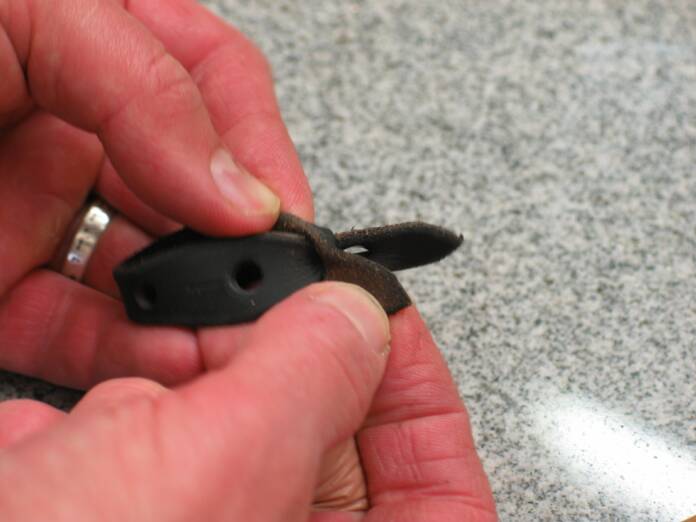
With the leather forced through the smaller slit, the ends of the hammer loop have been locked together.
CAUTION: The next photo may be a little too much for folks with a squeamish stomach. You may want to stop here. I don't have anything new posted right now.
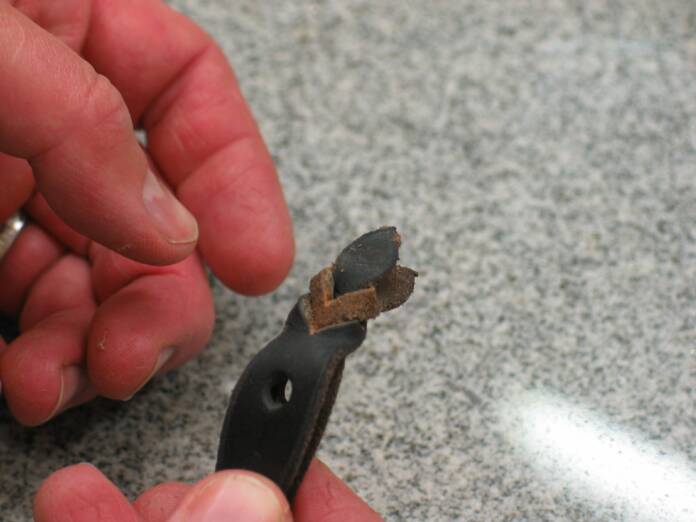
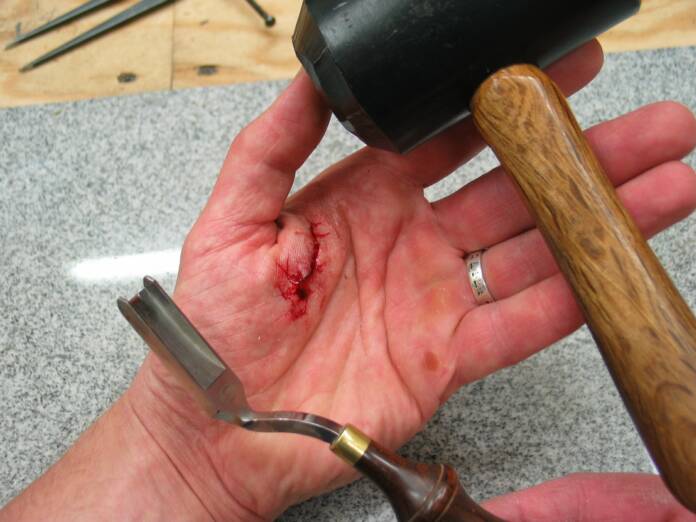
This is what happens when you don't use tools the way they were intended, or use them unsafely. In this case, I was doin' both. I stuck a Ron's #8 Safety Beveler a 1/2" into my hand while using it to round off the top edge of my mallet.
However, I'm happy with the way my modified mallet works! I'm enjoying my forced time off while my hand mends. On the bright side, I'll be able to get caught up on computer work since I can still type.
I'll go and draw the illustrations I need to show how to make the four-string braid for the hammer tie-down. I'll post those on the next page when I get 'em done.
To braid the thong for the hammer tie-down, it is easier to see if I use illustrations. Here, I have looped both 20 inch lace through the hole in the fold of the hammer tie-down. Both ends of one lace are held on the right side, both ends of the other lace are held on the left side.
In the illustrations, the shaded lace indicates the flesh side of the lace. As you can see, the flesh side of the lace it to the back, and the hair side of the lace is on the facing side. In the illustrations, I don't show the whole length of the lace for the sake of illustration.
Starting with lace end labeled 1, take it behind 2, and between 3 & 4, then back over to be held on the left side with 2.
Then, from the right, 4 goes around behind 3, between 1 & 2, over 1, and back to the right to be held with 4.
Notice how 1 folded over so the flesh side is now to the back. This is important so the hair side of the lace will be be visible consonantly as the braid proceeds.
From the left, 2 passes behind 1, between 4 & 3, over 4, and back to be held next to 1. With 4 folding around and returning to the left, all the hair side of the laces are facing the braider. This should continue to the end of the braid.
At this point, only 3 has not made the pass behind.
Pull up and out with the two sets of lace on each side. Work them against each other to tighten up the braid.
This should be done from now on whenever a lace passes around and returns to its proper side.
Now, 3 passes behind 4, between 2 & 1, over 2, and returns to the right.
All laces have now made the circuit. To continue the braid, start again with 1, and repeat the steps.
You will want to braid a longer section of the lace than you think you will need. That will aid in passing the braid through the holes in the holster. After the hammer tie-down is adjusted to the hammer, the excess braiding will be unbraided so the knot can be made in the appropriate place.
Use a bulldog clip, or rubber bands to fasten the two laces on the left and right together till you are ready to run the braid through the holes in the holster.
