Making
Russell Crowe's
"3:10 to Yuma"
"Hand of God" Rig.
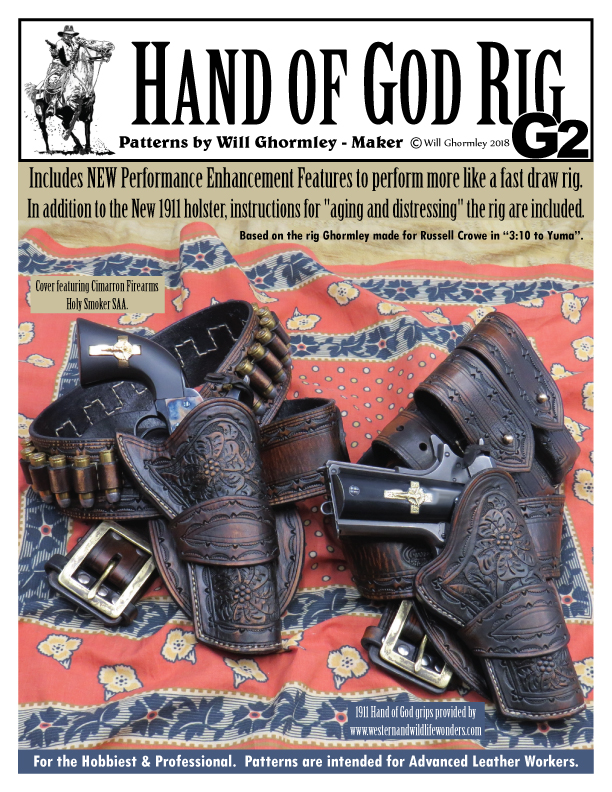
The 4-page Pattern Pack, with 11 Holsters that fit over 30 of the most popular Western Action Shooting revolvers, plus the classic 1911! Pattern Pack also include performance enhanced options and instructions on how to "age and distress" your rig.
Will Ghormley
P.O. Box 152
Chariton, Iowa 50049
If you have questions, click this link to send an email.
See "How-To" Photos and Explanations Below
The Specific "How-To" Details for Making the "Hand of God" Rig.
This page isn't meant to be a complete "How-To" of holster and cartridge belt making. My intention is to cover the specifics of making the "Hand of God" Rig used by Russell Crowe in the movie, "3:10 to Yuma". This page is to supplement the patterns and directions included in my new pattern for this rig.
All of the photos shown are taken while making a complete rig from the pattern pack. The rig made is the one photographed for the envelope cover.
The distance from the edge for the edge gouges is set out in the pattern. Marks on the pattern indicate the space between Veiner impressions. Most of the impressions are made with the V708 Veiner. But, on the outside edge, the V417 Veiner is used to take up the extra space in the pattern caused by being on the outside curve of the holster loop.
Even though the larger V417 is used, you don't notice the difference in sizes between the Veiners on the finish holster loop. The U858 Mule's Foot is used between the Veiners to complete the edge pattern used on both the holster and the belt. When the edge stamping is done, bend the damp leather into the shape it will be around the holster, and let dry.
After the pattern has been transferred to dampened leather with a stylus, the surface of the leather must be incises along the lines. The result will look like this.
The next stamping tool in the series is the C830 Camouflage Tool. If ever you don't have the exact number tool I mention, use the closest thing you have. Some of the tools I use are over 30 years old and are no longer being manufactured.
Next come the Pear Shaders. I used P206 for the larger impressions, and P703 for the smaller impressions.
The Bevelers establish the predominance of the elements in the composition. A large F901 is used on both sides of the border lines. A B198 is used for most of the other lines. I use a A117 in the acute corners where the B198 doesn't fit.
I have also modified a whole series of Bevelers, Matters, and Backgrounders to get the effects I want. The Craftools are inexpensive enough I buy multiples of each and modify them to work better.
The Veiners are next. I used the V708 for all the impressions on the holster. Notice how the Veiner is used along the edges of the flower petals, and in the confluence of the stems and leaves.
I used the S864 Seeder for the centers of the flowers. A H907 Stop is used to define the terminus of each of the leaves and stems as they flow into the larger stock. A series of U858 Mule's Foot impressions are used to accent each of the Stops.
An A101 Bar Grounder is used for the background in this composition. I don't like the choppy lines made by the five-hole Bar Grounders, so I carefully file off the outside holes, leaving only three holes to make the impression. I also make the holes more defined with a Dremel tool for nice crisp bumps. Then, after making the first impression, I overlap the first hole of the tool on the last bump of the impression. That helps me line up my impressions in a nice flowing line. Of course, I only make two bumps with each impression, but I like the results.
Also, I pick lines to follow that create a flow to the background. As a general rule, I never line my Bar Grounder up with any border line, preferring instead to go with the flow of a leaf, stock, or flower.
Decorative Cuts finish off the floral carving for the "Hand of God" holster. Nothin' fancy, just a series of nice, clean, flowing lines. These I make with a specially shaped blade I hone myself. It is a little easier for my old hands to get the kind of fine cuts I use to be able to get when I was in my prime. Ah, those were the days.
While the leather is still damp, I fold over the skirt at the line and tap it down to a crisp fold with a hammer, usually which ever one is closest. Be careful not to leave hammer-head impressions in the leather.
Then, I gently fold over the pouch and line it up so it will be easier to sew when it's time. On this rig, I also flair-out the top of the pouch to make re-holstering the revolver easier and quicker. If you want it to look distressed, fold it over abruptly and leave crease marks on the face of the holster.
To start the belt edge tooled pattern, the edge gouges are spaced according to the markings in the pattern pack. When the edge gouges are made, it's time to lay out the spacing for the edge toolin'.
I hadn't originally planned to photograph these construction instructions, so the next few photos are after the fact.
To start the pattern, the U858 Mule's Foot is used to mark the inside and outside points at the end of the belt.
The Wing Divider, (seen being used in the next photo), is set at the distance of one U858 Mule's Foot and one V708 Veiner impression side-by-side. I usually make the impressions on a scrap of leather for this measurement. Once you have the measurement set on your Wing Divider, place one end of the Divider in the heel impression of the U858 Mule's Foot at the inside point of the end of the belt. Make a series of impressions with the Wing Divider down the length of the belt as shown in the photo below.
Above, I'm illustrating how I used the V463 Veiner to make two impressions on the outside edge of the belt, to compensate for the extra distance not used on the inside edge, made by the V708. I hope that's clear enough, but if not, ask questions.
Here I show how the Wing Divider lines up with the set of the U858 Mule's Foot impression and the V708 Veiner impression.
By using the Wing Divider, it is much easier to have a consistent spacing. It allows you to make all the V708 Veiner impressions at one time, then go back and fill-in the U858 Mules' Foot impressions.
Even though I've already edge tooled the belt, I can show how I line-up and mark the spacing, so both sides of the belt lineup with impressions from the other side.
Here I use an antique square and a stylus to show how I transfer the mark made by the Wing Divider to lineup the impressions on both sides of the edge gouges and both sides of the belt.
At this point, I've cut out and tooled all the pieces for the "Hand of God" holster and belt. It's time to start the process of preparing them for aging.
Here I "block-out" the pours in the leather using organic bee's wax. I'm rubbing it halfway between the stitching marks on the cartridge loop leather. This will give the illusion wear on the loops has worn off the coloration.
Here is a photo of some of my modified Craftools. The modified tools are on the bottom line, and their factory counterpart are directly above. The edges are files and polished for what I feel is better performance.
After the bee's wax is laid down, I take a scrap piece of brain tanned deer hide and rub-in and smooth-out the bee's wax. The leather doesn't need to be brain tanned deer hide, just some soft suede leather that doesn't have any color in it that will transfer to the leather you are workin' on.
The same process is done on each piece of the rig. You guess where you would see wear, then rub bee's wax on that spot.
In reality, that kind of wear would take decades. But, in the world of Hollywood, it's all about the image. The camera, (and the human eye), see the variation in coloration and it registers as wear and age.
Here I burnish the wax down with my deer hide. You can see how the wax has sealed and slickened the surface of the leather. The iron oxide from my tank of rusty water will have a difficult time penetrating that burnished down wax.
However, the recesses of the tooling isn't getting much wax, so the impressions will take on the iron oxide quicker and turn darker. This will give it the look of years of use. This step is repeated on all the leather parts.
Here is my rust tank. It sets on a small oven with a short chimney up the back. From time to time it helps re-circulate the iron oxide through the water if it is brought to a boil. Never get the water too hot for your hand if you have leather in the tank!
Also, in the winter, I have to build a fire under it and thaw it out if I want to use it.
I keep a slab of Cottonwood over it as a lid to keep out debris and make it more difficult for mosquitos to live in it.
The rusty lookin' film on the water indicates the iron oxide isn't well circulated within the tank.
Straps of soft iron line the tank to maximize the surface area of iron to the effects of the water. A loop of electrical wire is submerged in the water to suspend the leather from.
Before I can use the tank, I will heat it and rub my hands up and down the iron straps and the inside of the tank, dislodging the iron oxide.
A string is run through each of the pieces in a place where it won't make a mark on the visible portion of the finished rig. Each piece is suspended in the rusty water where it isn't allowed to touch the sides or any other piece of leather.
If the leather is touching other leather, there will be a lighter shadow in that place. If the leather is touching iron, there will be a dark streak or blotch in that place. I move the pieces from time to time to make sure they aren't touching.
Here are the collected pieces after being removed from the tank and dried.
The strings are still attached to give you some ideas on how to attach them to keep from leaving faint lines.
The leather has a light gray coloration at this point. If I had left it in longer, it would turn a deep purple black that will never rub off on clothing. However, since I want the illusion of age, I took it out early.
Experimentation will give you an idea of how long to leave your leather in the tank. It looks darker while it is wet. It will dry lighter, but as you can see in this photo, when you apply the extra virgin olive oil, it darkens again.
If in doubt, take the leather out and let it dry. If it isn't dark enough, dunk it some more. You can always make it darker with repetition, but you can never lighten it up.
Now Available!
Hand of God Rig G2 pattern pack now available through the Leather Crafters and Saddlers Journal online store front.

